Crochet Vintage Cake box
Vintage cake box

Material
- Cardboard
- Box Cutter/ Scissors
-
Yarn (Medium Weight)
- For reference mine was Loops and Thread Soft Classic Amethyst Medium 4
- Other scrap yarn colors
-
Crochet hook: 4.5mm
Abbreviations:
slst- (slip stitch)
CH- (chain)
SC: (single crochet)
HDC- (half double crochet)
DC- (double crochet)
BLO- (behind loop only)
Cardboard
Cut 5 cardboard pieces
If you are planning to fit into a cubby hole, leave 0.5” on each of the exact measurement
For example, for a 13” x 13” box cut around 12.5” x12.5”.
Important! Check to see if your cardboard box fits within the cubby hole before you start crocheting!
Note decorations should only be on the one front side if you are planning to fit this into a cubby hole. If you want to have decoration on the edges please create your cardboard box accordingly.
Crochet Cake Cover
Base
- Ch47
- Turn work, start HDC in second chain, HDC 45 in next 45 chains
- *Turn work and hdc 46* repeat
- Repeat until you reach the box end for me I had around 28 rows
Note:
You can crochet less rows than you think because with acrylic yarn it is quite stretchy and you’ll want this to fit more snug.
Make sure to periodically check and fit your crochet piece onto your cardboard box
Height
- When you are ready to make the height, turn your work
- Start crocheting around the edges of your rectangle in the back loop only
-
HDC until you finish one row and slst at the first hdc to close off the row
-
ch 1 and repeat HDC entire rows with both loops this time until you reach desired height
Note:
Your rows should be curling upwards the more you crochet the height.
I stopped turning my work here and you can also just keep crocheting around and around
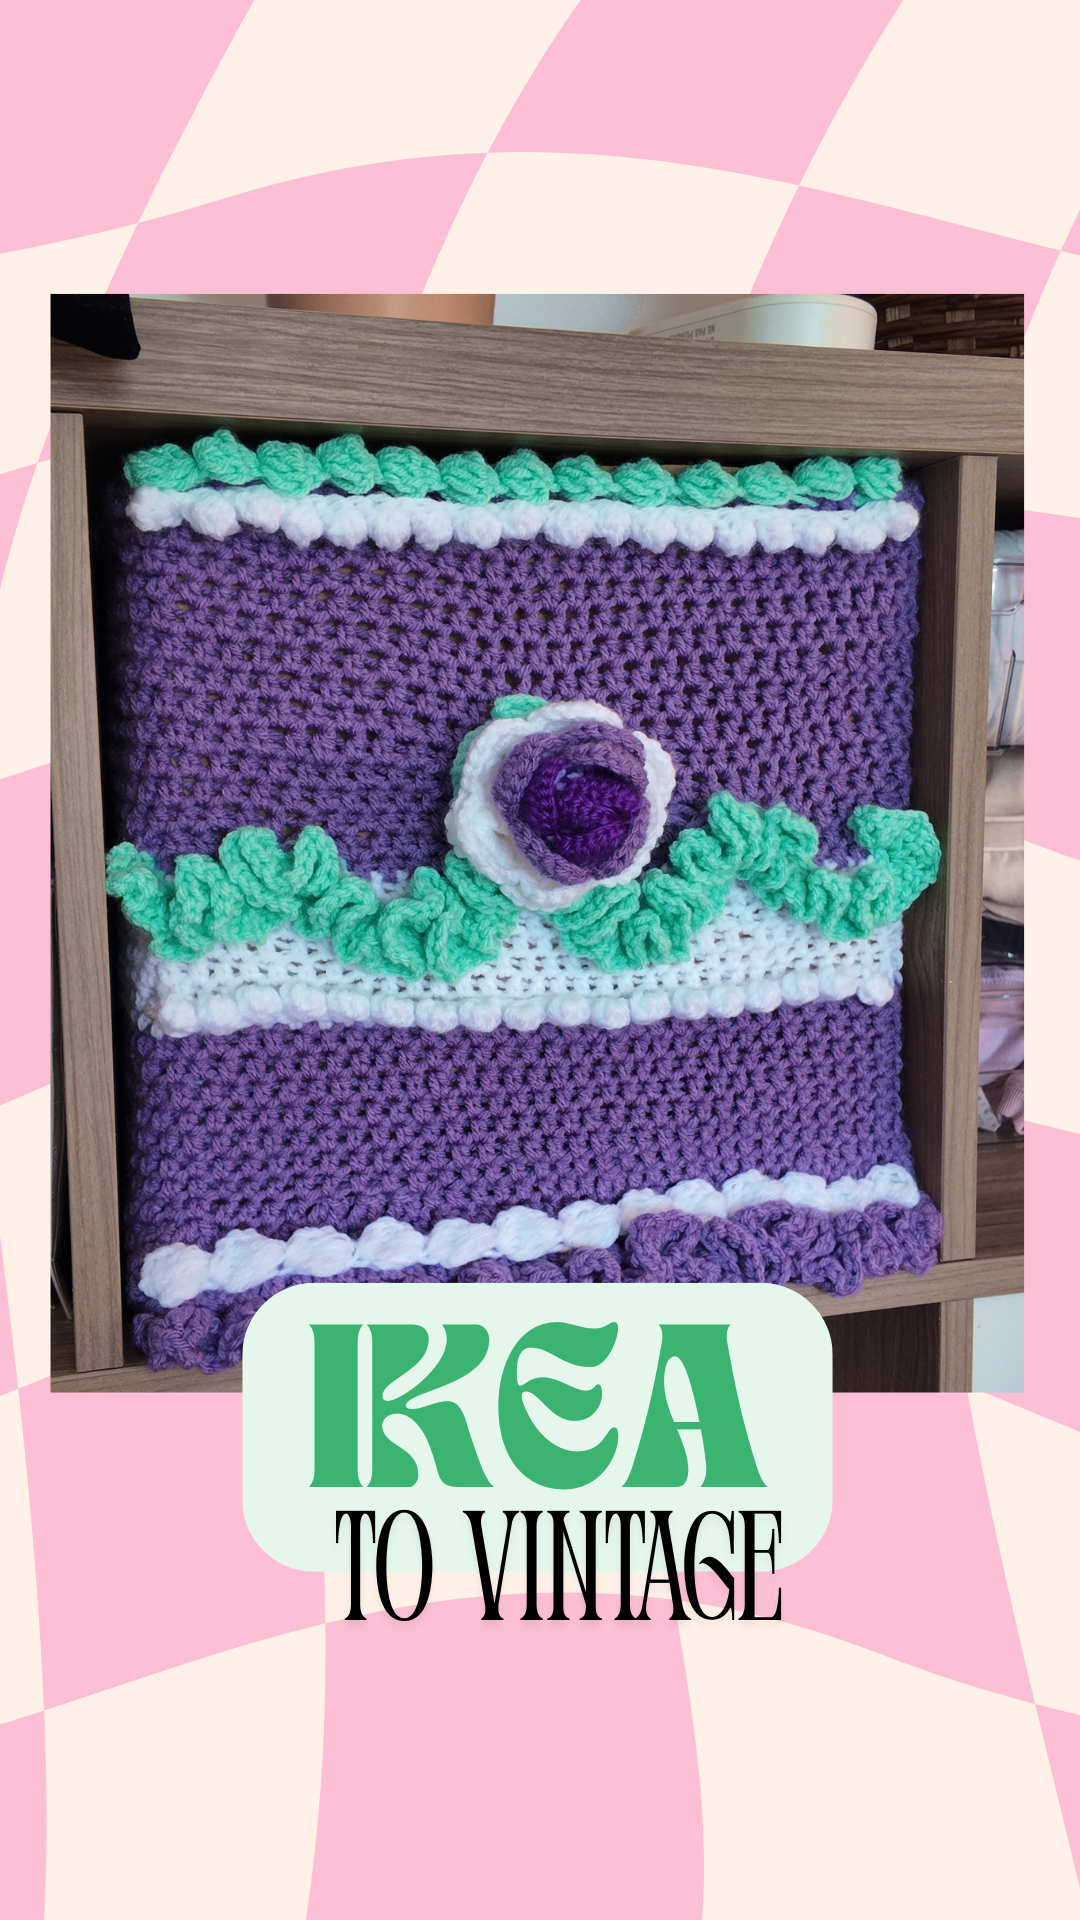
For the ruffle edge on cake
- Insert hook (4DC in one space, ch2, 4DC in next space ch2) repeat until your desired length
For the cream bobble stitch (White)
- Ch until desired length
- 4 Dc in same space until you have 5 chains on your hook, yarn over and pull through all chs, ch2
- Repeat on the next chain.
Sew it together!
Organize your creams and other decorations onto the front face and sew everything down.
Or you can hot glue it on too.
Keep in mind if you have too many heavy items the cover may slip down. So for that i fastened the top and the heavy areas with staples so that it would look more aesthetically pleasing!
Consider subscribing to my newsletter to get more fun DIY projects in your inbox!